
Progress Report Page

Click images for larger
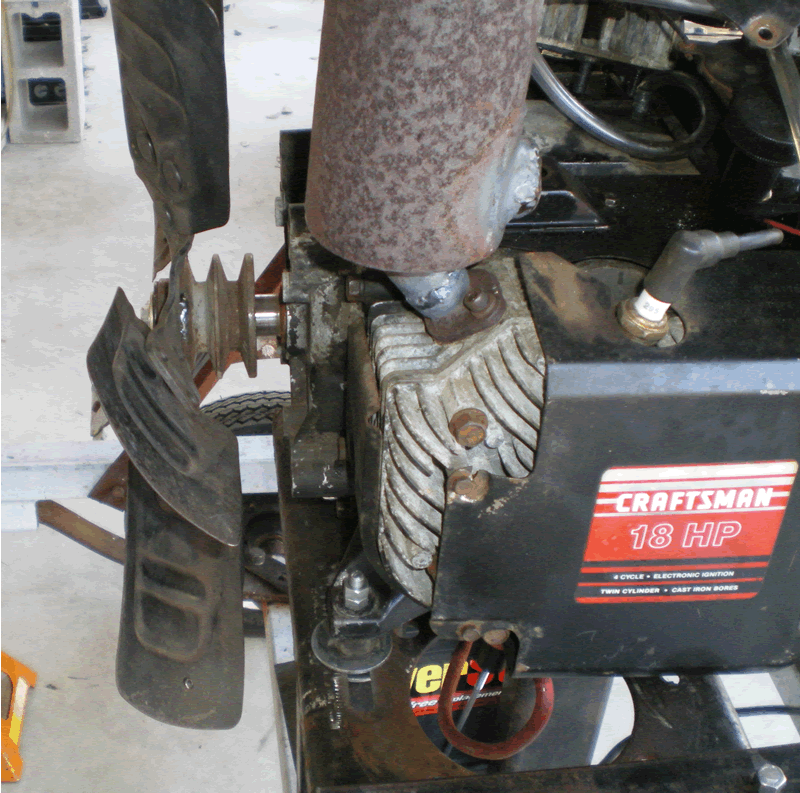
Fan Shroud
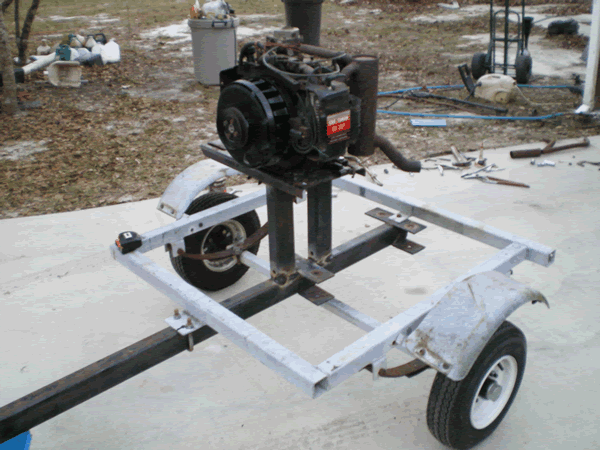
Beginning of engine stand
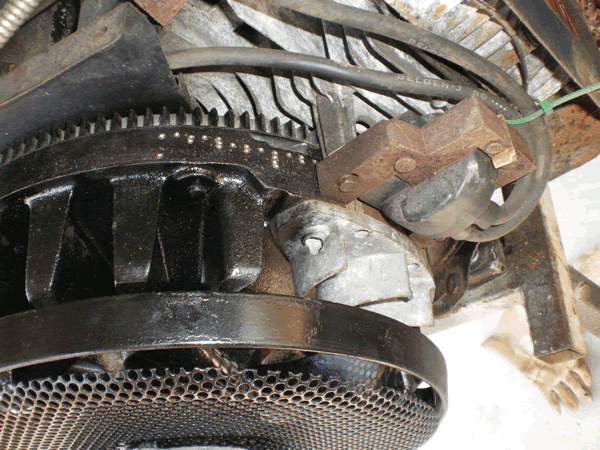
Stock ignition w/marks

Valve lapping with hot glue
preheat bolt and valve with
propane torch, use tubing
and drill after cooled.
 For
those who may be curious, that long page title at the top of your browser
serves a search engine purpose. By placing all those words in each page
title, the search engines find more page hits for the following topics
"what if dyno", "poor man's dyno", "low budget
engine test stand", "HHO", "ION", and "water
vapor".
For
those who may be curious, that long page title at the top of your browser
serves a search engine purpose. By placing all those words in each page
title, the search engines find more page hits for the following topics
"what if dyno", "poor man's dyno", "low budget
engine test stand", "HHO", "ION", and "water
vapor".
1. Installed engine mount on the boat trailer, and bolted engine to the mount using rubber pads to reduce vibration of the test stand.
 2.
Mounted the instrument panel and fuel tank to the test stand. Installed
a fuel shut-off valve with a vent to the top of the fuel tank. When the
fuel supply is shut off, the vent now allows fuel to flow down the clear
1/4-inch-ID fuel line which is next to a metric yard stick to measure
fuel consumption rate.
2.
Mounted the instrument panel and fuel tank to the test stand. Installed
a fuel shut-off valve with a vent to the top of the fuel tank. When the
fuel supply is shut off, the vent now allows fuel to flow down the clear
1/4-inch-ID fuel line which is next to a metric yard stick to measure
fuel consumption rate.
3. Installed battery, ignition switch and starter switch on the test stand.
4. Engine has a burnt intake valve on cylinder #1. Replaced same and hand lapped both valves on cylinder #1.
5. Ran engine and it is burning some oil and the carb needs work.
6. Found compression low on cylinder #1. Removed both pistons to replace the piston rings and found some pitting of both cylinders.liners (looks like old water rust). Installed new piston rings and honed both cyclinders to reduce the cylinder pitting. Hand lapped both valves on cylinder #2
7. Engine still burns oil after a few minutes of operation. Suspect it is the intake valve seals. Replaced both intake valve seals and the oil burning has stopped.
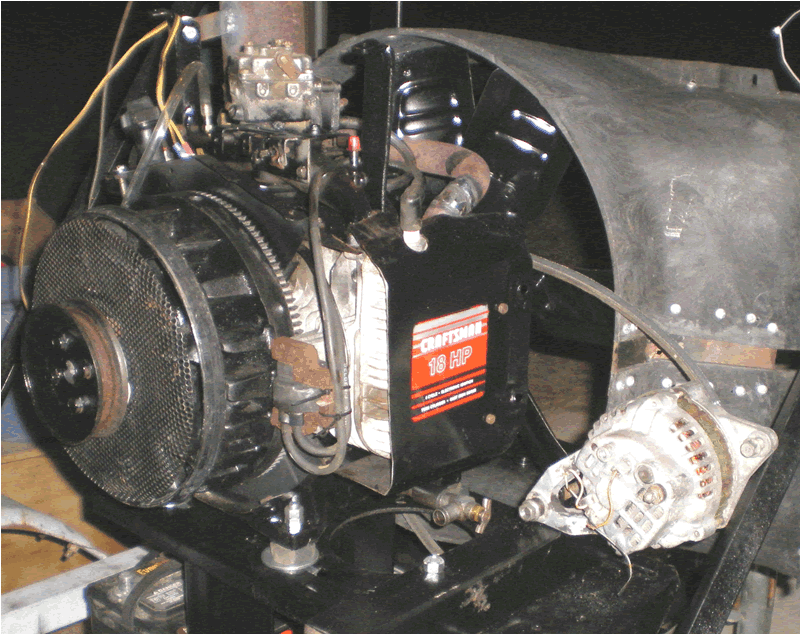
8. Carb has missing pump parts and non-adjustable main power mixture jet. Removed and replaced the carb with another carb from an Onan twin cylinder engine. This Onan carb has adjustable main power setting, but the mounting bolt pattern is off by 1/4-inch. Placed the intake manifold on a milling machine and machined a slot so either carb can now mount to the intake manifold. Also tapped a fitting for a vacuum hose connection to the intake manifold.
9. Moved the muffler out of the way for the fan and fan shroud. Required cutting and welding the exhaust pipes in 11-places.
10. Designed a mounting support for Coil On Plug (COP) for each cylinder bank. Only one COP will be used initially to fire both cylinders. At a later date, the second COP will be installed and used such that each cylinder will have it's own COP to facilitate measurement of combustion chamber ION signals. Keeping the stock ignition system intact for comparison purposes. Will just keep the kill switch ON while using the COP ignition coils. This future ION signal will indicate the crankshaft timing position where Peak Cylinder Pressure (PCP) occurs. When this PCP is at 16-degrees ATDC the maximum brake torque(MBT) is produced. This ION signal will be used to dynamically adjust ignition timing to maintain PCP at 16-degrees ATDC for various engine operating parameters.
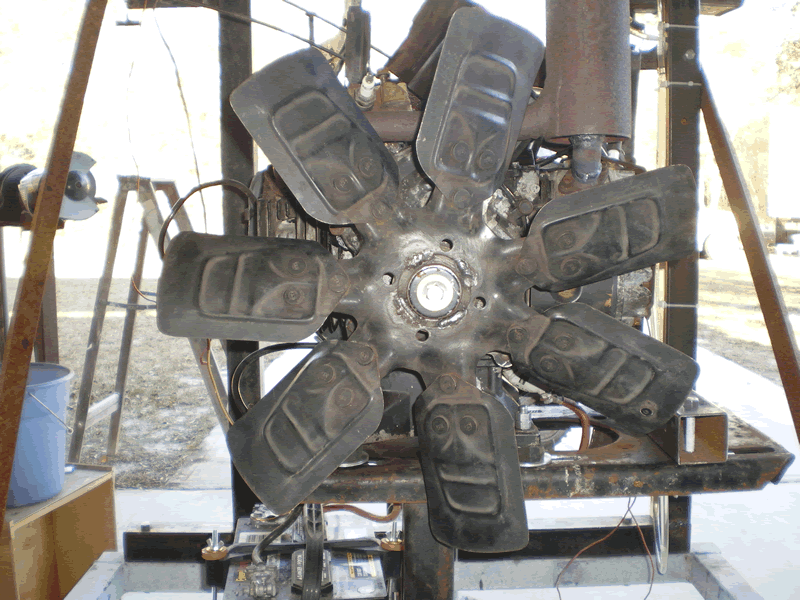
11. Machined a two belt v-pully so the 7-blade cooling fan sits in a recess on the v-pully. Then welded the fan to the v-pully. Engine runs smooth with no vibration with this fan load. Welded a third pully to this combination to miss the fan blades and drive the alternator.
12. Today an exhaust valve spring broke while conducting engine piston rings break-in. Removed the valve spring and found it had been weakened by rust where it is broken. Ordered replacement exhaust valve spring.
13. Modified a pickup truck cooling fan shroud and mounted it to the test engine stand. This fan shroud will provide required ducting to ensure maximum airflow efficiency for adequate engine loading and for cooling the engine. The shroud also provides safety protection to aid in keeping human body parts and dropped tools out of the spinning fan.
14. Mounted the alternator to the engine stand. The alternator rotates in the same direction as the 7-bladed truck cooling fan.
15. Installed an exhaust gas temperature sensor and a cylinder head temperature sensor that are designed for aircraft use. Mounted the associated gauges in the instrument panel.
16. Once we get the new valve spring installed, we must operate the engine to find where the exhaust gases under load are between 600 and 800 degrees farenheight. Then we will install two oxygen sensor bungs at that location in the exhaust manifold. One oxygen sensor will be narrow-band and the other will be wide-band. The wide-band will be used for setting the engine fuel mixture during testing and the narrow-band oxygen sensor will provide voltage signals similar to most automobile oxygen sensors.
contact Lynn and let him know what you would like to contribute.
Return to top of page. Return to HomePage
Copyright
© 2009 by Lynn W. Graves
Reproduction or republication for commercial use
prohibited without express written permission
See website rules for further legal information
Website owned and operated by Lynn W. Graves.
Last updated (09feb09
), lynn@whatifdyno.com